Craving a sweet treat that's both fun to make and delicious to eat? Imagine creating your own ice cream without needing fancy equipment or even an ice cream maker.
That's right—you can whip up a batch of creamy, dreamy ice cream right in a bag! It’s a simple, hands-on activity that you and your family will love. With just a few ingredients, a couple of bags, and a little bit of shaking, you'll have a delightful dessert that’s perfect for any occasion.
Are you ready to discover how you can turn this cool science experiment into a mouth-watering experience? Keep reading, and you'll soon be enjoying homemade ice cream that’s as fun to make as it is to eat.
Ingredients Needed
Making ice cream in a bag is fun and simple. The ingredients are easy to find and use. You only need a few basic items to create creamy ice cream at home. Some extra ingredients can make your ice cream tastier and more exciting. Below are the key ingredients for this cool treat.
Basic Ice Cream Components
- 1 cup heavy cream or half-and-half
- 2 tablespoons sugar
- 1/2 teaspoon vanilla extract
- Ice cubes (about 2 cups)
- 1/2 cup salt (rock salt or table salt)
- 1 quart-sized ziplock bag (for the ice cream mix)
- 1 gallon-sized ziplock bag (for the ice and salt)
Optional Flavor Add-ins
- Chocolate chips or chunks
- Fresh fruit pieces (strawberries, blueberries, etc.)
- Sprinkles or crushed cookies
- Peanut butter or chocolate syrup
- Cinnamon or cocoa powder
- Mint extract or other flavor extracts

Credit: lmld.org
Equipment Required
Making ice cream in a bag is a fun, hands-on activity that requires only a few simple items. Gathering the right equipment ensures your ice cream turns out creamy and delicious without any hassle. Let’s look at what you need to get started and why each piece is important.
Types Of Bags To Use
Choosing the right bags is crucial for this method. You’ll need two bags: one smaller and one larger.
- Small Sealable Bag:This bag holds your ice cream ingredients like cream, sugar, and flavorings. It should be sturdy and leak-proof to keep everything inside as you shake.
- Large Sealable Bag:This bigger bag contains ice and salt, creating the cold environment needed for freezing. Make sure it’s strong enough to handle crushing ice and vigorous shaking.
Using freezer-safe, heavy-duty plastic bags works best. Have you tried using a ziplock bag that wasn’t strong enough? It can burst, making a cold mess and spoiling your fun.
Additional Tools
Besides bags, a few extra items make the process smoother and more enjoyable.
- Measuring Cups and Spoons:Accurate measurements ensure your ice cream has the right texture and sweetness.
- Kitchen Towel or Gloves:Handling the cold bag filled with ice and salt can be uncomfortable. A towel or gloves protect your hands while shaking.
- Mixing Bowl and Spoon:Use these for mixing your ingredients before placing them in the bag.
- Timer:Keeping track of shaking time helps you avoid over or under-freezing the ice cream.
Having these tools ready before you start saves time and keeps your experience fun and stress-free. What’s your favorite flavor to mix up once you have everything set?
Step-by-step Preparation
Making ice cream in a bag is a fun and interactive way to create a delicious treat right at home. The process involves a few simple steps that anyone can follow, even without fancy equipment. Let’s break down the preparation so you know exactly what to do to get that creamy, cold dessert ready.
Mixing The Ingredients
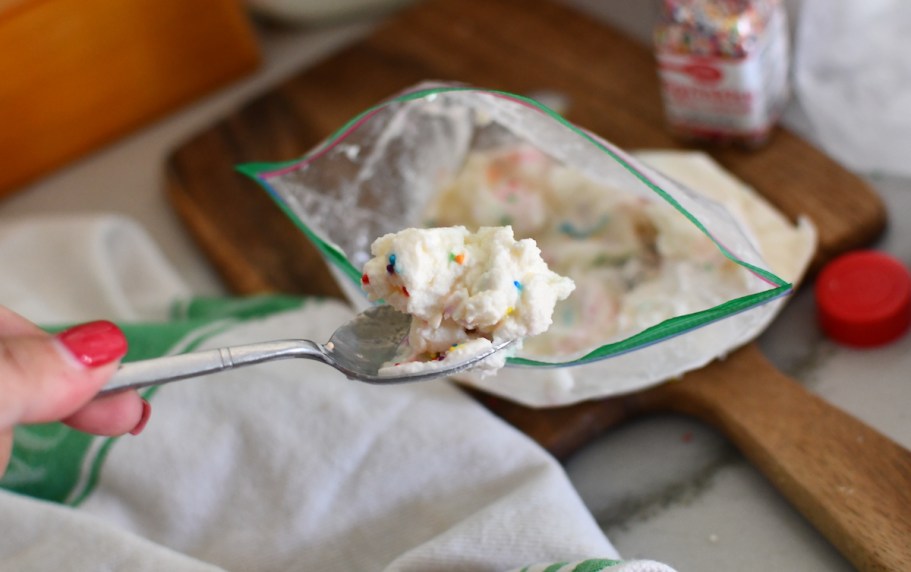
Start by gathering your basic ingredients: milk, sugar, vanilla extract, and a pinch of salt. Pour these into a small resealable plastic bag. Make sure to seal the bag tightly to avoid any leaks during the shaking process.
You can experiment here—try adding chocolate syrup or fresh fruit for unique flavors. Have you ever noticed how the right balance of sugar and salt can make your ice cream taste richer? It’s a simple trick worth trying.
Sealing The Bags
Next, place the small bag with your ice cream mixture inside a larger resealable bag filled halfway with ice and rock salt. The salt lowers the freezing point of the ice, which helps the mixture freeze faster.
Seal the larger bag carefully, making sure no saltwater can get inside the smaller bag. Double sealing can save you from a messy surprise. How cautious are you with sealing bags when making homemade treats?
Shaking Techniques
Now comes the fun part—shake the bags vigorously for about 5 to 10 minutes. Use quick, firm shakes to help the ice cream freeze evenly. It’s almost like giving your mixture a workout!
If you’re doing this with kids, turn it into a game to see who can shake the longest. Have you ever noticed how shaking rhythm affects the texture of your ice cream? Try different speeds and find what works best for you.

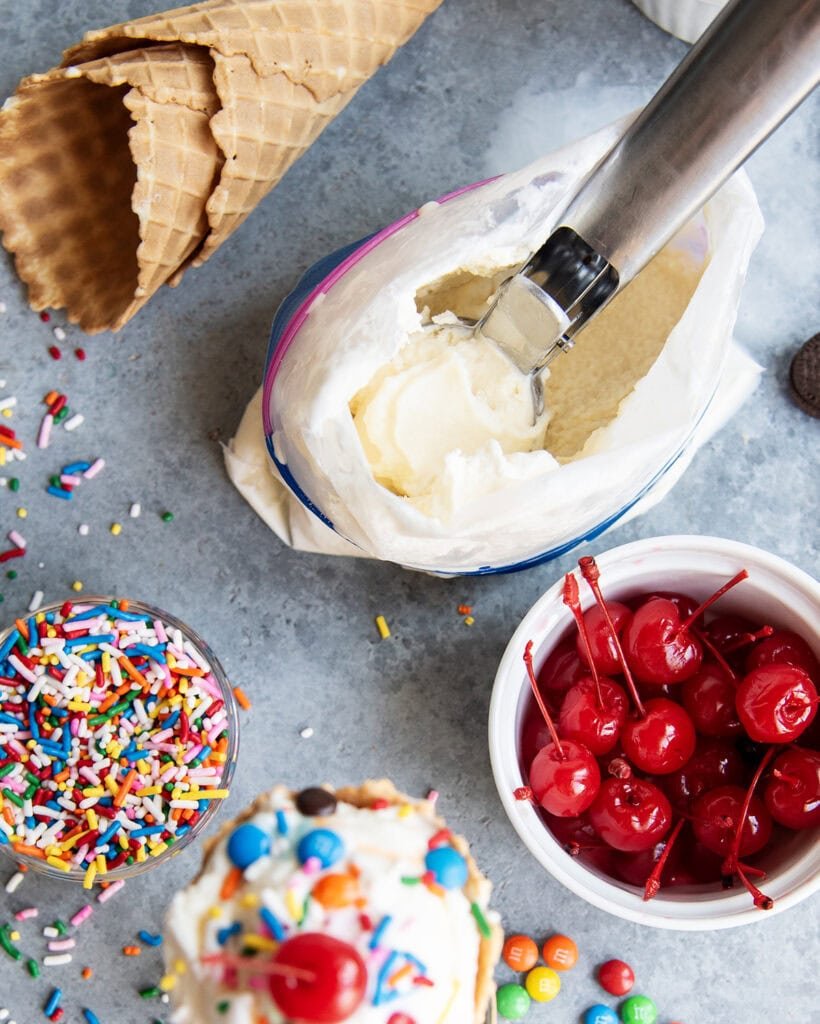
Credit: www.delish.com
Tips For Best Results
Making ice cream in a bag is fun and simple. To get the best results, a few key tips help ensure smooth and creamy ice cream. Small details make a big difference in texture and taste. Follow these tips to enjoy your homemade treat.
Maintaining Cold Temperatures
Cold is the key to turning your mixture into ice cream. Use plenty of ice in the larger bag. Add salt to the ice to lower the freezing point. This helps the mixture freeze faster and creamier.
- Use crushed ice for better contact with the smaller bag.
- Keep the bags sealed tightly to avoid leaks.
- Shake the bags gently but continuously for about 5 to 10 minutes.
- Wear gloves or wrap the bag in a towel to protect your hands from the cold.
Troubleshooting Common Issues
If your ice cream is too soft, shake the bag longer or add more ice and salt. Too much salt can make the ice cream too hard. Balance is important. If the mixture leaks, use fresh bags and seal them well.
- For icy texture, mix ingredients well before freezing.
- Use whole milk or cream for creamier ice cream.
- If the ice melts quickly, add more salt and ice.
- Try different flavors by adding vanilla or fruit to the mixture.
Fun Variations To Try
Making ice cream in a bag is already a blast, but adding your own twists makes it even more exciting. Trying different flavors and mix-ins lets you customize your treat exactly how you like it. Have you ever thought about what your favorite ice cream combo would be if you made it yourself?
Different Flavors
You don’t have to stick to plain vanilla. Experiment with natural extracts like almond, peppermint, or coconut to create unique flavors. Adding a spoonful of instant coffee powder can give your ice cream a rich mocha taste.
Fresh fruit purees are another fun option. Mash strawberries or blueberries and mix them in before shaking the bag. This adds a burst of natural sweetness and color without extra sugar.
Want something bold? Try adding a little cinnamon or chili powder for a surprising kick. These unexpected flavors can turn your homemade ice cream into a conversation starter at any gathering.
Add-ins And Toppings
Mix-ins are where you can really get creative. Crushed cookies, chocolate chips, or chopped nuts add texture and fun to every bite. You can even stir in mini marshmallows or candy pieces for a playful surprise.
Don’t forget about toppings! Drizzle caramel sauce, sprinkle sea salt, or add fresh fruit on top for an extra layer of flavor. These simple touches make your ice cream feel like a special treat.
What’s your go-to topping or add-in? Trying something new could make your next ice cream experience unforgettable.
Credit: hip2save.com
Benefits Of Bag Ice Cream
Making ice cream in a bag comes with several benefits that make it a popular choice for a fun and simple treat. This method is not only quick but also offers an interactive experience that anyone can enjoy. Whether you're looking to satisfy a sweet tooth or involve kids in a hands-on activity, bag ice cream offers something special.
Quick And Easy Process
You don’t need fancy equipment or long preparation times to make ice cream in a bag. The process takes just a few minutes and requires only a few common ingredients like milk, sugar, and ice.
Because the ice cream forms right inside the sealed bag, cleanup is minimal. You can have a fresh, creamy dessert ready faster than waiting for a store-bought treat to thaw.
Have you ever wanted ice cream right after dinner without leaving your kitchen? This method makes that possible.
Great Activity For Kids
Bag ice cream is perfect for involving children in the kitchen. It’s safe, simple, and hands-on, which keeps kids engaged and excited about making their own dessert.
Watching the ice cream form while shaking the bag is a fun science lesson in action. Plus, kids learn about ingredients and measurements in a practical way.
Does your child love experiments? This activity is a tasty experiment that teaches patience and creativity at the same time.
Frequently Asked Questions
How Do You Make Ice Cream In A Bag At Home?
To make ice cream in a bag, mix cream, sugar, and vanilla in a small bag. Seal it tightly. Place it inside a larger bag filled with ice and salt. Shake for 5-10 minutes until it thickens into ice cream.
What Ingredients Are Needed For Bagged Ice Cream?
You need heavy cream, sugar, vanilla extract, ice, and salt. These simple ingredients create creamy, sweet ice cream quickly. Salt lowers the ice's freezing point, helping the mixture freeze faster.
How Long Should You Shake The Ice Cream Bag?
Shake the bag vigorously for 5 to 10 minutes. This motion churns the mixture, turning it into creamy ice cream. The longer you shake, the firmer the ice cream becomes.
Can Kids Safely Make Ice Cream In A Bag?
Yes, kids can safely make ice cream with adult supervision. The process is fun, simple, and educational. Just be careful handling the ice and salt mixture to avoid cold burns.
Conclusion
Making ice cream in a bag is simple and fun. It needs just a few ingredients and a little shaking. Kids and adults enjoy the process and the tasty treat. This method works well at home or outside. You don’t need special machines or tools.
Try it to enjoy fresh ice cream anytime you want. It’s a quick way to make a cool dessert. Give it a go and see how easy it is!