Imagine planning your next big adventure, a thrilling hike or an epic biking trip, and realizing your essential gear isn't quite ready. Your trusty bladder bag, a critical part of your hydration plan, needs some attention.
You might be wondering how to clean it effectively to ensure it's not only ready for your next outing but also safe and hygienic. Cleanliness is crucial to maintaining the taste and safety of your water, and a well-maintained bladder bag can make all the difference in your experience.
By the end of this guide, you'll be equipped with simple, effective techniques to ensure your bladder bag is pristine, giving you one less thing to worry about as you embark on your next adventure. Dive in, and discover how easy it is to keep your gear in top condition, so you can focus on what truly matters—your journey.
Choosing The Right Supplies
Choosing the right supplies is key to cleaning a bladder bag properly. Using the best materials keeps the bag safe and clean. It also helps prevent infections and damage. The cleaning process becomes easier with the correct tools. This section explains what you need for effective cleaning.
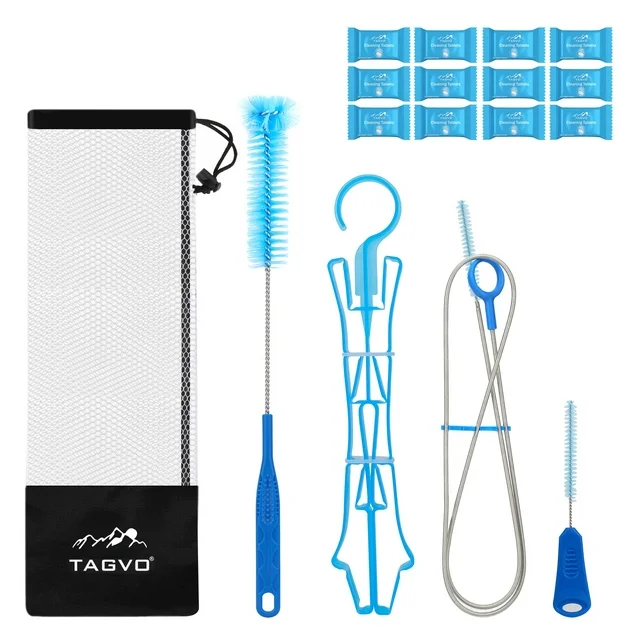
Essential Cleaning Materials
Start with soft brushes or sponges. They reach inside without scratching the bag. Use clean cloths for drying and wiping. A large container or basin helps soak the bag fully. Gloves protect your hands from germs and chemicals. Always choose materials that are gentle and safe for medical devices.
Disinfectants And Solutions
Disinfectants kill bacteria and germs inside the bag. Choose mild, non-toxic solutions made for medical use. Avoid harsh chemicals that can damage the bag’s material. White vinegar mixed with water works as a natural cleaner. Baking soda helps remove odors without strong smells. Follow instructions on any disinfectant to ensure safety and effectiveness.
Credit: sheexplorestheusa.com
Preparing For Cleaning
Preparing to clean a bladder bag is important for hygiene and safety. Proper preparation reduces the risk of infection. It also helps keep your equipment in good condition. Start by gathering all necessary supplies in a clean area. A calm and well-lit space works best. Follow these steps carefully for the best results.
Emptying The Bladder Bag
Begin by emptying the bladder bag completely. Hold the bag below the level of your bladder. Open the drainage tap or valve slowly. Let all the liquid drain into the toilet or a suitable container. Avoid touching the tip of the drainage outlet. Close the valve tightly after emptying. This step prevents leaks and helps with thorough cleaning.
Washing Your Hands
Clean hands prevent germs from spreading. Use warm water and soap. Rub your hands together for at least 20 seconds. Pay attention to fingernails, between fingers, and wrists. Rinse well and dry with a clean towel or air dry. Use hand sanitizer if soap and water are unavailable. Clean hands protect both you and your bladder bag during cleaning.
Cleaning Process
Cleaning a bladder bag regularly keeps it safe and hygienic. Proper care prevents infections and extends the bag’s life. The cleaning process involves several simple steps. Each step removes dirt, bacteria, and odors effectively. Follow these steps carefully for best results.
Rinsing The Bag
Start by emptying all liquid from the bladder bag. Rinse the bag with warm water to remove any leftover fluid. Fill the bag halfway with water, close it, and shake gently. Pour out the water and repeat until the water runs clear. This step removes most debris and prepares the bag for deeper cleaning.
Using Soap And Water
Add mild, unscented soap to warm water. Avoid harsh chemicals that can damage the bag material. Use a soft cloth or sponge to clean the inside and outside. Gently scrub all surfaces, focusing on corners and seams. Rinse the bag thoroughly with clean water to remove soap residue. Proper soap use helps remove oils and dirt safely.
Disinfecting The Bag
Disinfect to kill bacteria and prevent infections. Use a solution of one part white vinegar to three parts water or a diluted bleach solution. Fill the bag with the disinfectant and let it sit for 10-15 minutes. Rinse the bag well with water to remove all disinfectant. Allow the bag to air dry completely before use. Disinfection keeps the bladder bag fresh and safe.
Credit: sheexplorestheusa.com
Drying And Storing
Drying and storing your bladder bag correctly is just as important as cleaning it. If moisture lingers, bacteria and mold can grow, causing unpleasant odors and health risks. Proper drying and safe storage extend the life of your bladder bag and keep it hygienic for daily use.
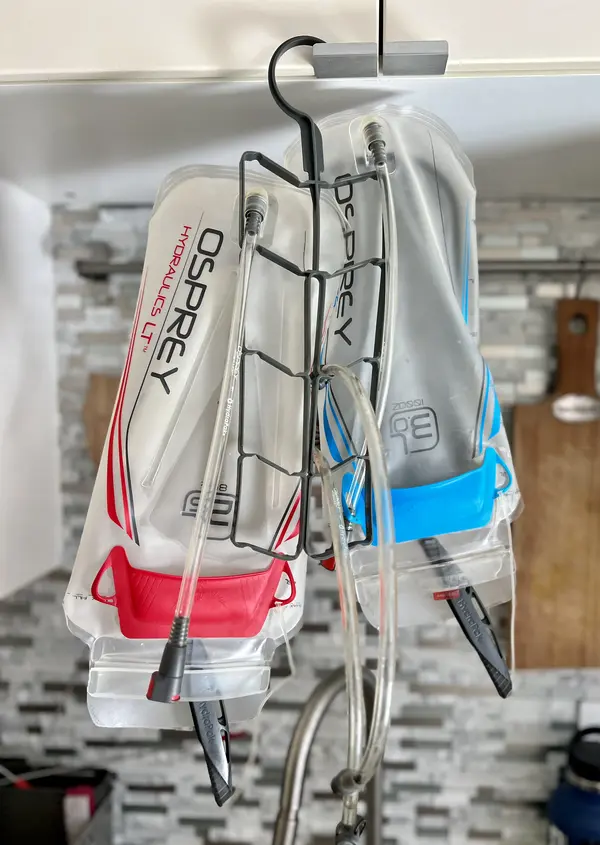
Proper Drying Techniques
After washing your bladder bag, shake out as much water as possible. Hang it upside down in a well-ventilated area to allow air to circulate inside and outside. Avoid direct sunlight, which can degrade the material over time.
Consider using a clean, dry towel to gently pat the bag inside and out. This helps remove excess moisture quickly. If your bladder bag has a wide opening, use a drying rack or a bottle brush to keep it open for faster drying.
Have you ever noticed a sour smell despite washing? That often means the bag wasn’t fully dry. Make sure every part feels completely dry before storing to prevent bacteria growth.
Safe Storage Tips
Store your bladder bag in a cool, dry place away from direct sunlight and heat sources. A breathable fabric bag or container works better than plastic, which traps moisture and encourages mold.
Keep your bag separate from other items that might contaminate it, like shoes or dirty clothes. Labeling the storage area or container can help you stay organized and avoid confusion.
If you use your bladder bag regularly, inspect it before each use. Look for any signs of damage or lingering moisture. Safe storage isn’t just about where you keep it but how you treat it daily.
Maintenance Tips
Keeping a bladder bag clean is essential for health and comfort. Proper maintenance prevents infections and unpleasant odors. It also extends the life of the bag and keeps it working well.
Follow simple tips to maintain your bladder bag effectively. Regular care makes a big difference in daily use.
Frequency Of Cleaning
Clean the bladder bag after every use or at least once a day. Rinsing the bag with warm water helps remove urine residue. Use mild soap or a cleaning solution recommended by healthcare providers. Avoid harsh chemicals that can damage the bag.
Empty the bag completely before cleaning. Allow it to dry fully to prevent bacteria growth. Store the bag in a clean, dry place when not in use.
When To Replace The Bag
Replace the bladder bag every 5 to 7 days, or sooner if it shows damage. Look for cracks, leaks, or discoloration. Any foul smell that doesn’t go away after cleaning signals a need for replacement.
Consult your doctor or nurse for advice on the right replacement schedule. Using a damaged bag increases infection risk and discomfort.
Credit: sheexplorestheusa.com
Common Mistakes To Avoid
Cleaning a bladder bag is simple, but some common mistakes can cause problems. Avoid these errors to keep your bag safe and hygienic. Doing it right helps prevent infections and extends the bag’s life.
Using Harsh Chemicals
Strong cleaners can damage the bladder bag’s material. Stick to mild soap or products made for medical bags. Harsh chemicals may cause leaks or cracks over time.
Not Rinsing Thoroughly
Soap or cleaning agents left inside can irritate the skin. Always rinse the bag well with clean water. Rinse until no soap bubbles appear.
Ignoring Drying Time
Storing the bag wet encourages bacteria and mold growth. Let the bag air dry completely before use or storage. Use a clean, dry area for drying.
Skipping Regular Cleaning
Cleaning only once in a while allows germs to build up. Clean the bladder bag regularly, as recommended by your healthcare provider. Regular cleaning keeps it safe and fresh.
Using Hot Water
Hot water can warp or weaken the bag’s plastic. Use lukewarm or cool water to clean the bag. Hot water may shorten the bag’s lifespan.
Neglecting To Check For Damage
Do not forget to inspect the bag during cleaning. Look for cracks, leaks, or wear and tear. Replace the bag if you find any damage to avoid health risks.
Frequently Asked Questions
How Often Should I Clean A Bladder Bag?
Clean your bladder bag daily to prevent bacteria buildup. Regular cleaning ensures hygiene and reduces infection risk. Follow specific cleaning instructions from your healthcare provider for best results.
What Is The Best Solution To Clean A Bladder Bag?
Use a mixture of warm water and mild soap or a vinegar solution. Avoid harsh chemicals as they can damage the bag. Rinse thoroughly to remove all cleaning agents.
Can I Reuse A Bladder Bag After Cleaning?
Yes, you can reuse a bladder bag after proper cleaning. Ensure it is completely dry and disinfected before reuse. Replace the bag as recommended by your healthcare professional.
How Do I Dry A Bladder Bag After Cleaning?
Air dry the bladder bag by hanging it in a clean, well-ventilated area. Avoid direct sunlight or heat sources, which can damage the material. Ensure it is fully dry to prevent mold growth.
Conclusion
Cleaning your bladder bag regularly keeps it fresh and safe. Use mild soap and warm water for best results. Avoid harsh chemicals that can damage the bag. Rinse well to remove all soap traces. Let the bag air dry completely before use.
A clean bag helps prevent infections and odors. Follow these simple steps to care for your bladder bag daily. Small efforts make a big difference in hygiene and comfort. Keep your bladder bag clean and enjoy peace of mind.