Are you ready to unleash your inner fighter and take your workout routine to the next level? Installing a punching bag at home might just be the game-changer you need.
Imagine having your own personal stress reliever and fitness booster, right in the comfort of your space. Whether you're aiming to improve your boxing skills, build strength, or simply find a new way to unwind, a punching bag can do wonders.
But before you can start throwing punches, you need to get it set up correctly. Don't worry, it's easier than you think! Stick around, because by the end of this guide, you'll have all the know-how to install your punching bag like a pro. Let's get started!

Credit: www.vevor.ca
Choosing The Right Punching Bag
Choosing the right punching bag is crucial for your training success. It affects your technique, safety, and how much you enjoy your workouts. Understanding different options helps you pick a bag that fits your space, skill level, and goals.
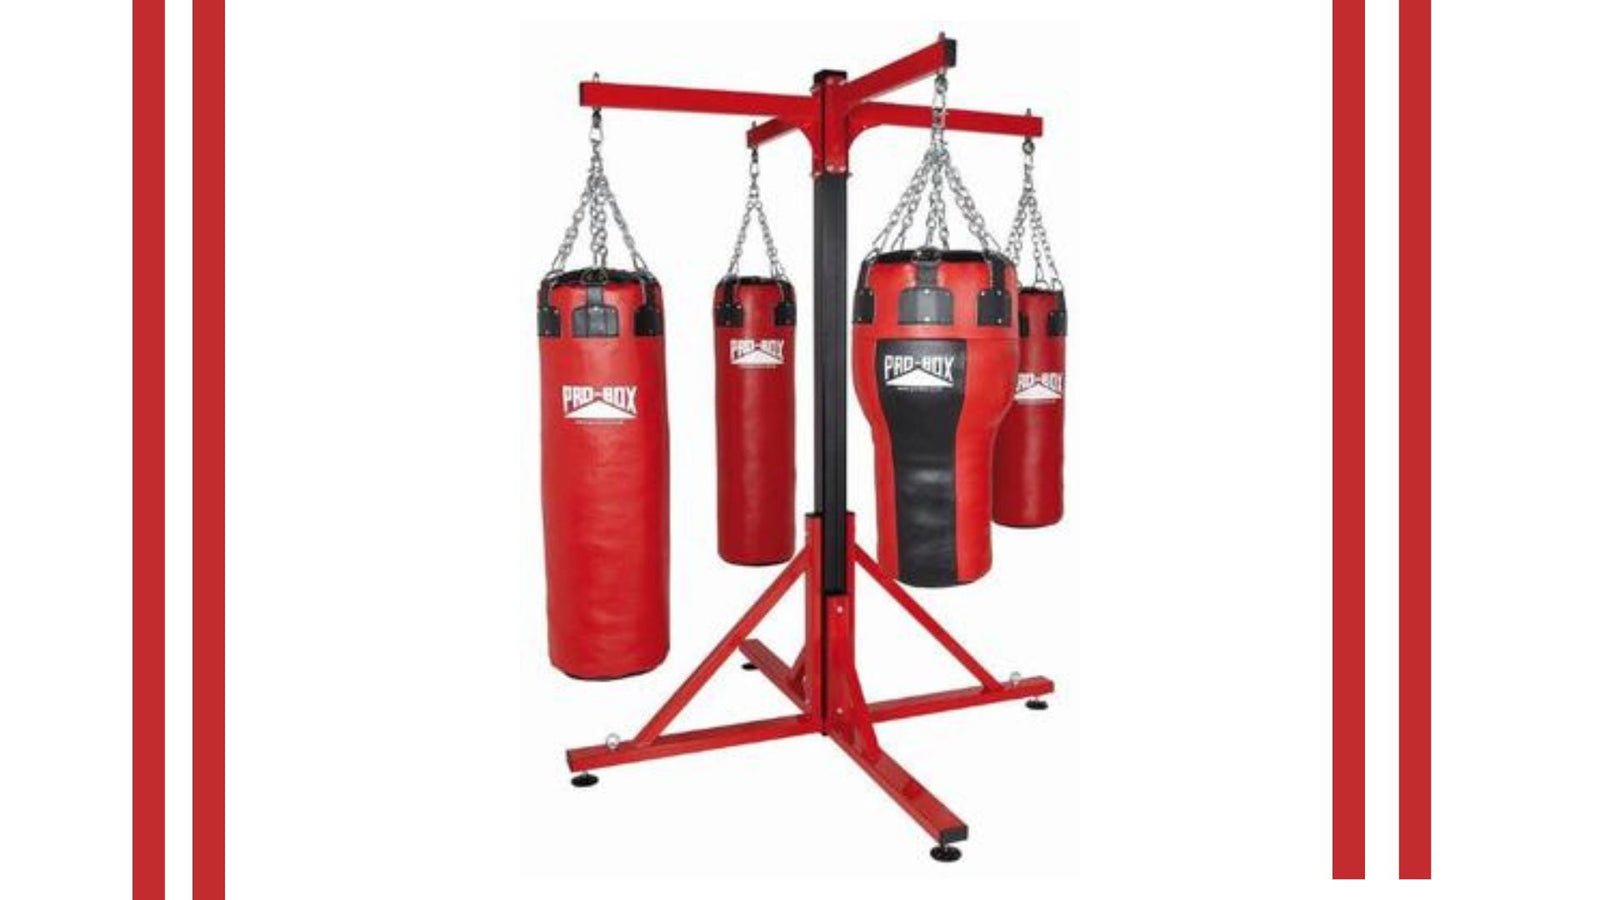
Types Of Punching Bags
Punching bags come in various styles. Heavy bags are great for power and endurance training, while speed bags improve hand-eye coordination and rhythm. There are also double-end bags that help with accuracy and reflexes.
Think about what you want to focus on. Are you training for boxing, MMA, or just fitness? Your choice here sets the foundation for your progress.
Weight And Size Considerations
The weight of your punching bag should match your body weight and strength. A good rule is choosing a bag about half your weight. Lighter bags move more, which can improve timing, but heavier bags build power.
Size matters too. Taller users might prefer longer bags for practicing kicks, while smaller bags work well for quick punches. Where will you hang it? Make sure the size fits your available space.
Material Options
Punching bags come in leather, synthetic leather, canvas, and vinyl. Leather bags feel more natural and last longer but cost more. Synthetic options are budget-friendly and easier to clean.
Inside, bags can be filled with sand, cloth, or foam. Each type changes how the bag feels on impact. Have you tried different materials to find what feels best for your training style?
Selecting The Installation Spot
Choosing the right spot to install your punching bag affects your workout quality and safety. You want a location that supports the bag’s weight, offers enough room to move freely, and fits your lifestyle. Let’s look at what matters most when picking that perfect spot.
Indoor Vs Outdoor Locations
Deciding between indoor and outdoor installation depends on your space and weather conditions.
- Indoor:Protects your bag from rain, sun, and wind, which helps it last longer. Plus, it’s easier to control the environment—like lighting and temperature.
- Outdoor:Offers more space and fresh air, but you must choose a sheltered spot or invest in a weather-resistant bag. Think about how exposure might wear down your equipment over time.
Have you checked if your outdoor area has a shaded corner? That could save you future headaches with maintenance.
Ceiling And Wall Support
Your punching bag needs a sturdy anchor point that can handle constant swinging and heavy punches.
- Ceiling mounts:Look for beams made of solid wood or metal. Drywall alone won’t hold up; you’ll need to find the joists behind it.
- Wall mounts:Choose studs inside the wall—not just drywall. A heavy-duty bracket bolted into these studs can provide strong support.
Before drilling, use a stud finder or tap to locate the best support spots. Have you tested the strength of your mounting point by gently pulling or hanging weight? That quick check can prevent accidents.
Space Requirements
Enough room around your punching bag lets you move freely and practice different techniques safely.
- Allow at least 3 to 4 feet of clearance on all sides. This space prevents accidental hits to walls or furniture.
- Consider your workout style—if you like footwork drills, more space is crucial.
- Think about where you’ll stand for shadowboxing or rope jumping near the bag.
Is your chosen spot roomy enough for dynamic movement? If not, you might feel cramped, which could limit your training progress.
Gathering Necessary Tools And Materials
Before you hang your punching bag, make sure you have all the tools and materials ready. Missing something in the middle of your project can slow you down or even cause safety issues. Having everything at hand lets you focus and get the job done right the first time.
Mounting Hardware
Your punching bag needs sturdy support. The right mounting hardware is key to holding the bag securely and safely.
- Heavy-duty ceiling mount or wall bracket:Choose based on where you plan to hang your bag.
- Anchor bolts or lag screws:These keep the mount firmly attached to a ceiling joist or wall stud.
- Swivel hook or carabiner:Allows your bag to swing freely without twisting the chains.
- Chains or straps:Used to hang the bag from the mount.
Have you checked if your ceiling or wall can handle the weight? Picking the right hardware depends on that.
Tools Checklist
Gathering the right tools keeps your installation smooth and safe. Here’s what you’ll typically need:
- Electric drill with bits (for drilling into wood or concrete)
- Stud finder (to locate ceiling joists or wall studs)
- Measuring tape (to ensure proper placement)
- Wrench or socket set (for tightening bolts and screws)
- Screwdriver (both flathead and Phillips)
- Level (to keep the mount straight)
- Ladder or step stool (to reach high spots safely)
Missing just one tool can force a pause. Double-check your tools before starting. What’s your backup plan if you realize you don’t have the right drill bit halfway through?
Safety Gear
Protecting yourself during installation is just as important as securing the bag. Simple safety gear can prevent injuries.
- Safety glasses (to protect your eyes from dust and debris)
- Work gloves (to protect your hands while handling hardware)
- Dust mask (especially if drilling into old or dusty materials)
- Sturdy shoes (to provide good footing and protect feet from falling objects)
Think about how you’ll stay safe if something slips or falls. How confident are you that your work area is secure enough to avoid accidents?
Installing A Ceiling Mount
Installing a ceiling mount for your punching bag is a smart way to save floor space and create a sturdy setup that can handle intense workouts. The key is to ensure the mount is securely attached to a ceiling joist, which can support the weight and movement of the bag. Let’s break down the process into clear, manageable steps so you can install your punching bag safely and confidently.
Finding A Ceiling Joist
Start by locating a ceiling joist—the horizontal beam that supports your ceiling. Use a stud finder to scan the ceiling area where you want to hang your bag. Move the device slowly until it signals a joist, then mark the spot with a pencil.
If you don’t have a stud finder, try tapping the ceiling lightly and listen for a solid sound versus a hollow one. Joists are typically spaced 16 or 24 inches apart, so once you find one, you can measure from it to find others. This step is crucial because mounting into drywall alone won’t support your punching bag’s weight.
Drilling And Securing The Mount
Once you’ve marked the joist, drill a pilot hole slightly smaller than the mounting bolt. This helps prevent the wood from splitting and makes it easier to screw in the hardware. Use a drill bit suitable for wood and keep the hole straight.
Next, secure the ceiling mount bracket using heavy-duty lag bolts or screws designed for ceiling installations. Tighten them firmly with a wrench or drill, ensuring the mount doesn’t wiggle. If the mount comes with a swivel, check that it moves freely without any looseness.
Hanging The Bag Safely
Attach a strong carabiner or quick link to the ceiling mount, then hook your punching bag’s chain or strap onto it. Double-check all connections to make sure they’re locked and secure. Give the bag a gentle pull and swing to test stability before starting your workout.
Consider adding a protective mat or padding on the floor beneath the bag to prevent damage or injury. Have you ever underestimated the force of a heavy bag swing? Taking these safety measures protects your space and your training experience.
Setting Up A Wall Mount
Setting up a wall mount for your punching bag creates a strong, safe place to train. A well-installed mount holds the bag steady. It keeps your workouts smooth and effective. Let’s explore how to pick the right wall and install the mount securely.
Choosing A Sturdy Wall
Select a wall that can hold heavy weight. Concrete or brick walls work best. Avoid drywall or thin paneling. They may not support the bag’s force over time.
Look for a space with enough room around the bag. Make sure the area is clear of obstacles. This prevents accidents and gives you freedom to move.
Mount Installation Steps
- Locate studs or solid anchors in the wall for mounting.
- Use a stud finder to mark the best spots.
- Drill pilot holes to prepare for screws or bolts.
- Attach the wall mount bracket using heavy-duty bolts.
- Check that the mount is level and firmly fixed.
Attaching The Bag
Hang the punching bag using a strong chain or strap. Connect the bag’s top loop to the mount’s hook or eye bolt.
Ensure the chain length allows the bag to hang freely without touching the floor.
Test the setup by gently pulling the bag. The mount should hold steady without movement.
Using A Freestanding Punching Bag
Using a freestanding punching bag is a great option if you want flexibility and easy setup. These bags don’t require mounting to walls or ceilings, making them perfect for apartments or spaces where drilling isn’t allowed. Plus, you can move them around to fit your workout area or even take them outside.
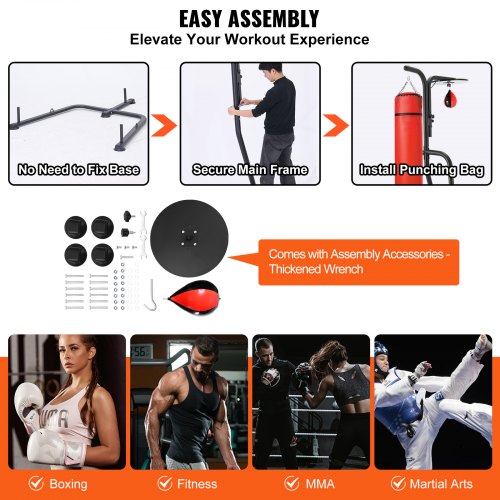
Assembly Instructions
Start by unpacking all parts and laying them out. Most freestanding bags come with a base, a pole, and the bag itself. Attach the pole to the base securely, usually by screwing it in or locking it with bolts provided.
Next, attach the punching bag to the top of the pole. This might involve snapping it in place or tightening bolts. Don’t forget to fill the base with water or sand to keep it stable—water is easier to handle, while sand provides better weight.
Check all connections are tight before use. A wobbly bag can ruin your workout or cause injury. Took me a few tries to get mine stable, but once done, it worked perfectly for heavy punches and kicks.
Positioning Tips
Place your freestanding bag on a flat, non-slippery surface to avoid movement during workouts. Leave at least 3 feet of space around it so you can move freely. Consider your workout style; if you like to circle the bag, ensure there’s enough room to do so safely.
Avoid placing it too close to walls or furniture to prevent damage. Natural light can boost your energy, so try setting it near a window if possible. Think about your workout flow—would you prefer the bag near your weights or cardio equipment?
Maintenance Advice
Check the bag and base regularly for wear and tear. Tighten bolts and screws every few weeks to keep everything secure. If the base is filled with water, empty it and refill occasionally to prevent mold or bacteria buildup.
Wipe down the bag after workouts to remove sweat and dirt. Using a mild soap and water solution works well. This keeps the material from cracking or smelling bad over time.
Have you noticed a slight wobble or unusual noise? It’s a sign to inspect the base or pole connection. A well-maintained bag lasts longer and keeps your training safe and effective.
Safety Tips During Installation
Installing a punching bag requires care to ensure safety. Following safety tips during installation protects you and your space. It prevents accidents and damage. Pay close attention to stability, surroundings, and ongoing checks for the best results.
Checking Stability
Start by choosing a strong support beam or ceiling joist. Use a stud finder to locate it accurately. Make sure the beam can hold the bag's weight and force from punches. Use heavy-duty hardware like eye bolts and chains. Tighten all connections firmly to avoid shaking or falling. Test the bag gently before full use to check its stability.
Protecting Surrounding Areas
Clear the area around the bag installation spot. Remove fragile or sharp objects nearby. Use wall padding or mats to protect walls and floors. Keep enough space for movement and safe punching. Consider noise reduction pads to avoid disturbing others. This setup prevents damage and keeps your training space safe.
Regular Inspection
Check the bag and its hardware regularly. Look for loose bolts, worn chains, or tears in the bag. Replace or repair parts immediately if you find damage. Inspect the support beam for cracks or weakness. Keep the installation clean and dry to prevent rust or decay. Regular checks maintain safety and extend the bag's life.
Credit: www.vevor.ca
Maintaining Your Punching Bag Setup
Keeping your punching bag setup in top shape ensures it lasts longer and performs better. Regular maintenance not only protects your investment but also guarantees a safer and more effective workout. Are you ready to learn simple ways to care for your bag and hardware?
Cleaning The Bag
Dirt, sweat, and dust can build up on your punching bag quickly. Wiping it down after each use with a damp cloth helps prevent grime from settling in.
Use mild soap and water for a deeper clean once a month. Avoid harsh chemicals that could damage the bag's material.
Dry the bag thoroughly to stop mold or mildew from forming. Have you noticed a strange smell or sticky surface? That’s a sign it’s time for a good cleaning.
Tightening Hardware
Loose chains, swivels, or ceiling mounts can cause your bag to swing unpredictably or even fall. Check all bolts and hooks regularly to make sure they are snug.
A simple wrench or screwdriver can solve most issues. If you hear creaking sounds or feel wobbling, tighten the hardware immediately.
Don’t wait for a dangerous accident—how often do you inspect your bag’s attachments?
Replacing Worn Parts
Over time, chains might rust, swivel joints may wear out, and hooks can bend. These parts affect the bag’s stability and your safety.
Keep spare chains and hooks handy so you can replace damaged pieces right away. Using worn hardware is a risk you don’t want to take.
Notice any cracks or tears in the bag’s surface? Repair patches or replacement bags might be necessary to keep your training smooth and injury-free.

Credit: www.reddit.com
Frequently Asked Questions
How Do I Choose The Right Punching Bag For Installation?
Select a punching bag based on your training style and space. Consider weight, size, and material for durability and comfort. Choose between heavy bags, speed bags, or double-end bags depending on your workout goals.
What Tools Are Needed To Install A Punching Bag?
You typically need a drill, anchors, screws, a stud finder, and a heavy bag hanger. Safety gear like gloves and goggles is also recommended. These tools ensure secure and safe installation.
Can I Install A Punching Bag Without Ceiling Support?
Yes, use a free-standing punching bag stand or wall mount bracket. Ensure the stand or bracket can support the bag’s weight. This option is ideal if ceiling mounting isn't possible or practical.
How High Should I Hang A Punching Bag?
Hang the bag so its midpoint is at chest height. This allows for comfortable striking and effective training. Adjust height based on your reach and training needs.
Conclusion
Installing a punching bag is simple with the right steps. Choose a strong support, like a ceiling beam or wall bracket. Use proper tools to secure the bag safely. Check the bag’s height and adjust for comfort. Regularly inspect the setup to keep it safe.
Training at home becomes easier and fun. Enjoy your workouts and stay consistent. Your punching bag will last longer with good care. Start today and improve your fitness easily.