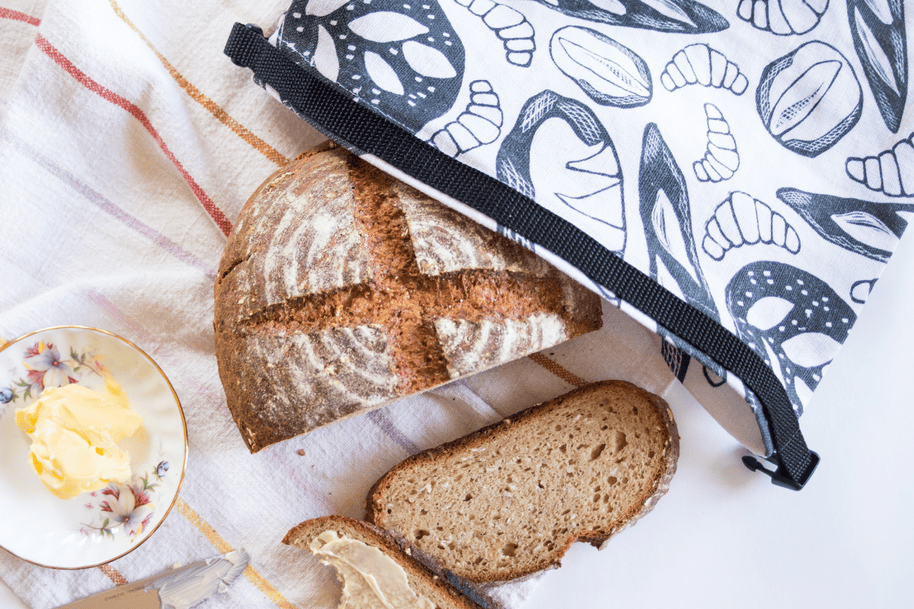
Imagine the satisfaction of pulling out a fresh loaf of bread from a bag you crafted yourself. Not only does a homemade bread bag keep your bread fresher for longer, but it's also an eco-friendly alternative to plastic.
If you're tired of store-bought options that never seem quite right, you’ve come to the perfect place. You're about to discover how easy it is to sew your very own bread bag. Even if you're a beginner, this project is straightforward and rewarding.
Stick around, because by the end of this article, you'll have all the steps you need to create a beautiful, functional bread bag that you can proudly say is handmade by you.

Credit: faithandfabricdesign.com
Materials Needed
Gathering the right materials is key to sewing a bread bag that lasts and looks great. Choosing fabric and tools carefully will save you time and frustration. Think about what you want your bread bag to feel like and how you’ll use it every day.
Choosing The Right Fabric
Pick a fabric that breathes well to keep your bread fresh longer. Cotton and linen are excellent choices because they allow air circulation and are easy to wash. Avoid synthetic fabrics that trap moisture and can make bread go stale quickly.
Consider using a natural, untreated cotton canvas or a lightweight linen for durability. If you want a bit of style, look for fabric with simple patterns or textures that won’t distract from the bag’s purpose. Have you checked if your fabric is food safe and free from harmful chemicals?
Essential Sewing Tools
Having the right tools makes sewing your bread bag a smooth experience. Make sure you have sharp fabric scissors—they make clean cuts and prevent frayed edges. Pins or clips will hold your fabric pieces together without slipping.
You'll also need a sewing machine with a standard needle or, if you prefer, a hand sewing needle for precise stitching. Don’t forget thread that matches your fabric in color and strength. A measuring tape and fabric chalk will help keep your cuts accurate and neat.
- Sharp fabric scissors
- Pins or fabric clips
- Sewing machine or hand needles
- Thread matching your fabric
- Measuring tape
- Fabric chalk or pencil

Credit: www.sharonhollanddesigns.com
Preparing The Fabric
Preparing the fabric is an important step in sewing a bread bag. It helps ensure the fabric is clean, the right size, and ready to sew. Taking time here prevents problems later and makes your project smoother.
Measuring And Cutting
Start by measuring the fabric carefully. Use a ruler or measuring tape to get exact dimensions. Most bread bags need a rectangle about 14 by 16 inches. Mark the fabric with a fabric pencil or chalk for clear cutting lines.
Cut the fabric with sharp scissors to get clean edges. Cutting straight lines makes sewing easier and the final bag look neat. Keep the fabric flat and steady while cutting to avoid mistakes.
Pre-washing Tips
Wash the fabric before cutting and sewing. This removes any dirt or chemicals from the fabric. It also stops the bag from shrinking after sewing.
- Use cold water and mild detergent to protect the fabric.
- Dry the fabric fully before cutting to keep the shape accurate.
- Iron the fabric after washing to smooth out wrinkles.
Pre-washing helps keep your bread bag looking good and lasting longer.
Sewing The Bag
Sewing the bread bag is a simple yet rewarding task. It transforms fabric into a useful item for storing fresh bread. This section guides you through the key steps to construct the bag properly. Follow the instructions carefully for neat results.
Stitching The Main Body
Start by folding your fabric in half, right sides facing each other. Align the edges carefully. Use pins to hold the fabric in place. Sew along the two sides, leaving the top open. Keep your stitches straight and even. This creates the main pouch for the bread.
Use a ¼ inch seam allowance for a strong hold. Backstitch at the beginning and end to secure the stitches. Trim any excess fabric from the seams to reduce bulk. Turn the bag right side out after sewing. Press the seams flat for a clean finish.
Creating The Drawstring Channel
Fold the top edge of the bag down about 1 inch to the inside. Press this fold with an iron to set the crease. Fold it down again the same amount to hide the raw edge. Pin the fold in place all around the top. Sew close to the lower edge of the fold, leaving space for the drawstring.
Make sure the channel is wide enough for your drawstring cord. Leave a small opening to thread the drawstring through. Use a safety pin attached to the drawstring to pull it easily. Once threaded, tie knots at the ends of the drawstring to keep it from slipping out.
Adding The Drawstring
Adding the drawstring to your bread bag is a key step. It keeps the bag closed and fresh. The drawstring makes the bag easy to open and close. Choose the right material and insert it carefully. This part is simple but important for the bag’s function.
Selecting A Drawstring Material
Pick a drawstring that is strong and soft. Cotton cords work well because they are gentle on fabric. Twisted cotton rope or thin braided cord also fits nicely. Avoid rough or stiff materials that can damage the bag.
Consider these points:
- Thickness should match the casing size
- Choose a color that suits your bag
- Material must be durable for daily use
- Natural fibers breathe better than synthetic ones
Inserting The Drawstring
Start by threading the drawstring through the casing. Use a safety pin attached to one end for easier pulling. Push the pin slowly through the channel, gathering the fabric as you go.
Make sure the drawstring moves freely inside the casing. Once the string is all the way through, tie knots at both ends. This prevents it from slipping back inside.
Test the drawstring by pulling both ends. The bag should close tightly without strain. If needed, adjust the length before final knots. This simple step keeps your bread fresh longer.
Finishing Touches
Finishing touches are what transform your bread bag from a simple sewing project into a durable and attractive item you’ll want to use daily. Paying attention to these final details ensures your bag holds up well and looks great. Let’s focus on two key aspects that can elevate your bread bag’s quality and style.
Securing Seams
Strong seams are essential for a bread bag that lasts. After sewing, reinforce your seams by sewing a second line of stitches close to the first. This prevents the fabric from fraying and the bag from falling apart after multiple washes.
You can also use a zigzag stitch or a serger along the seam edges for extra durability. If you’ve ever had a bag unravel at the seams, you know how frustrating that can be. Taking a few extra minutes here can save you from that hassle.
Customizing Your Bread Bag
Adding personal touches makes your bread bag truly yours. Consider sewing on a small fabric label with your name or a fun phrase like “Fresh Bread Inside.”
You might also add a drawstring with colorful ribbon or a button closure to keep your bread fresh and secure. Think about what you want your bag to say about you—do you prefer simple and clean, or bright and bold?
Have you thought about using fabric paint or embroidery to create unique patterns? This not only adds beauty but can also help you quickly identify your bag in a shared kitchen.
Care And Maintenance
Proper care and maintenance keep your bread bag fresh and durable. Simple steps protect the fabric and maintain its look. Regular attention helps avoid wear and tear.
Cleaning the bag correctly removes crumbs and odors. Storing it right prevents damage and keeps bread fresh longer.
Washing Tips
- Hand wash with mild detergent to protect fabric fibers.
- Use cold or lukewarm water to avoid shrinking.
- Avoid bleach or harsh chemicals that weaken material.
- Rinse thoroughly to remove all soap residues.
- Air dry flat or hang in shade to keep shape.
- Machine wash only on gentle cycle if label allows.
Extending Bag Longevity
- Store in a dry, cool place away from sunlight.
- Empty crumbs regularly to prevent mold or pests.
- Repair small tears or loose stitches quickly.
- Use fabric fresheners or baking soda inside occasionally.
- Rotate multiple bags to reduce wear on one.
- Avoid overloading the bag to keep seams intact.
Benefits Of Bread Bags
Bread bags offer many benefits beyond simple storage. They help keep bread fresh and reduce waste. These bags are easy to sew and use repeatedly. Choosing bread bags supports a healthier planet and fresher food at home.
Eco-friendly Advantages
Bread bags reduce the need for single-use plastic bags. Using fabric bags lowers plastic waste in landfills and oceans. They can be washed and reused many times. Natural materials like cotton breathe better than plastic. This helps cut down pollution and protects wildlife. Sewing your own bread bag lets you pick safe, sustainable fabrics.
Preserving Bread Freshness
Bread bags keep bread from drying out too fast. They trap just the right amount of moisture. This prevents bread from becoming hard or moldy too soon. Fabric bags allow air to flow, reducing mold risk. Using a bread bag extends the shelf life of homemade or store-bought bread. Fresh bread tastes better and wastes less food.

Credit: www.sharonhollanddesigns.com
Frequently Asked Questions
What Materials Do I Need To Sew A Bread Bag?
You need fabric, thread, scissors, pins, and a sewing machine. Choose breathable fabric like cotton or linen for freshness. These materials ensure a durable and reusable bread bag that keeps bread fresh longer.
How Do I Choose Fabric For A Bread Bag?
Select natural, breathable fabrics like cotton or linen. Avoid synthetic materials that trap moisture. Breathable fabric helps maintain bread's texture and prevents mold growth.
Can I Customize The Size Of My Bread Bag?
Yes, you can easily adjust the bag size. Measure your bread loaf and add extra fabric for seams. Custom sizing ensures the bag fits your bread perfectly.
How Do I Maintain And Clean A Fabric Bread Bag?
Machine wash the bag on a gentle cycle with mild detergent. Air dry to preserve fabric quality. Regular cleaning keeps the bag fresh and hygienic for repeated use.
Conclusion
Sewing a bread bag is a simple and useful skill. It helps keep bread fresh and reduces plastic waste. You only need a few materials and basic stitches. Practice makes your sewing neater and faster. Enjoy making your own bread bags at home.
Save money and help the environment too. Try different fabrics and sizes for variety. Start your sewing project today and feel proud. Small steps lead to big changes.