Have you ever wanted a cosmetic bag that’s just perfect for your style and needs? Imagine having a bag that fits all your essentials, looks exactly how you want, and saves you money.
Sewing your own cosmetic bag is easier than you think, even if you’re new to sewing. In this guide, you’ll discover simple steps that anyone can follow to create a beautiful, functional bag. By the end, you’ll not only have a new skill but also a personalized accessory you’ll love to use every day.
Ready to get started? Let’s dive in!
Materials Needed
Before you start sewing your cosmetic bag, gathering the right materials is crucial. The quality and type of fabric, the tools you use, and any added decorations will all affect the final look and functionality of your bag. Let’s break down what you’ll need to create a beautiful and practical cosmetic bag.
Fabric Choices
Picking the right fabric can make your cosmetic bag both durable and stylish. Cotton canvas is a popular choice because it’s sturdy and easy to sew. If you want something water-resistant, consider nylon or laminated cotton, which helps protect your items from spills.
Do you prefer a soft, quilted look? Try using cotton with some batting inside for padding. Avoid very stretchy fabrics, as they can be tricky to handle and may not hold shape well. What kind of look do you want your bag to have?
Tools And Supplies
- Sewing machine:Essential for quick, strong seams. If you don’t have one, hand stitching works but takes longer.
- Thread:Choose a strong polyester or cotton thread that matches or contrasts with your fabric.
- Scissors:Sharp fabric scissors make cutting cleaner and easier.
- Measuring tape or ruler:Helps keep your pieces precise.
- Pins or clips:These hold your fabric pieces together while sewing.
- Zipper:A 7 to 9-inch zipper is usually perfect for a cosmetic bag.
- Iron:Pressing seams flat improves the bag’s appearance.
Optional Embellishments
Adding decorations can personalize your cosmetic bag and make it uniquely yours. Think about sewing on a small patch or applique that shows your style. You could also add a keyring or a fabric loop to make it easier to carry.
Do you want a splash of color? Try decorative stitching or fabric paint. Buttons, beads, or even a small charm on the zipper pull can add character. What little details would make your bag feel special to you?
Preparing Your Fabric
Preparing your fabric is the first and most important step in sewing a cosmetic bag. Proper preparation ensures your bag will have clean lines and a professional look. It saves time and prevents mistakes during sewing. Taking care with measuring and marking your fabric sets the foundation for your project.
Choose fabric that is sturdy yet flexible enough to hold shape. Cotton, canvas, or lightweight denim work well. Iron the fabric to remove wrinkles and make cutting easier. Use a flat, clean surface for accurate measuring and cutting.
Measuring And Cutting
Measure the fabric pieces carefully according to your bag’s size. Use a ruler or measuring tape for accuracy. Mark the dimensions lightly with a fabric pencil or chalk. Double-check each measurement before cutting.
Cut fabric with sharp fabric scissors or a rotary cutter. Cut slowly and follow your markings exactly. Keep your hand steady to avoid jagged edges. Cut all pieces needed: main body, lining, and any pockets.
Marking Seam Allowances
Seam allowances are extra fabric edges for sewing seams. Usually, ¼ inch or ½ inch is enough. Mark seam allowances clearly on all fabric pieces. Use a ruler and fabric pencil to draw straight lines inside the cut edges.
Consistent seam allowances help your pieces fit together perfectly. Mark notches or dots where pieces will join. This guides you during sewing and keeps corners neat.
Sewing The Main Body
Sewing the main body of your cosmetic bag is a crucial stage. This part shapes the bag and gives it its form. Focus on clean, straight stitches to ensure durability. Use pins to hold fabric pieces together before sewing. A steady hand and patience make a big difference here.
Stitching The Sides
Start by aligning the front and back fabric pieces with the right sides facing each other. Pin the edges to keep them from shifting. Sew along the sides using a straight stitch, about 1/4 inch from the edge. Keep your stitches even to avoid puckering. Backstitch at the beginning and end to secure the seams.
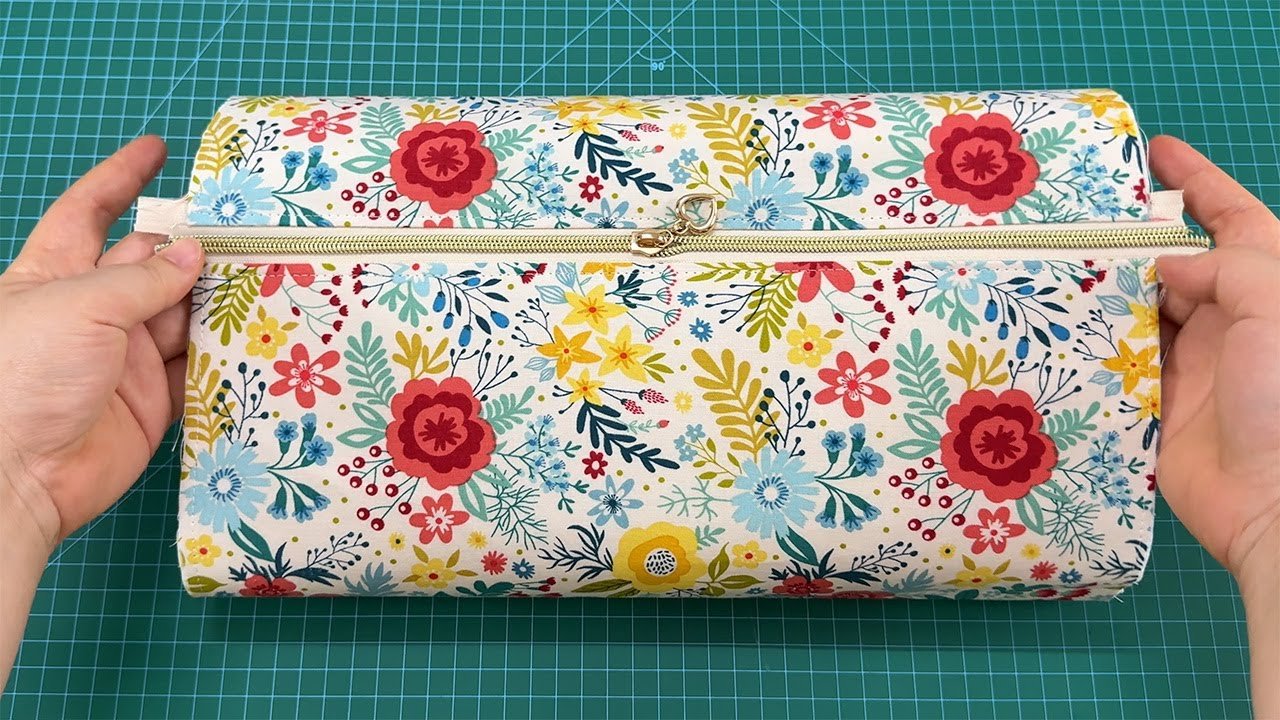
Creating The Base
Next, form the base to give the bag depth. Flatten the bottom corners and pinch them to create a triangle. Measure and mark the desired width of the base. Sew across the triangle’s edge, creating a flat bottom. Trim excess fabric and turn the bag right side out. The base helps the bag stand up and hold items easily.

Credit: www.youtube.com
Adding The Lining
Adding the lining to your cosmetic bag gives it a neat, finished look. It also hides the seams and adds strength. The lining fabric should be soft but durable. It makes cleaning easier and protects the bag’s contents.
Start by preparing the lining fabric carefully. Cutting and attaching the lining properly ensures a smooth fit inside the bag.
Cutting The Lining Fabric
Use the same pattern pieces as the outer bag. Cut the lining fabric with precision. Make sure the fabric pieces match the shape and size of the outer fabric.
- Lay your fabric flat on a clean surface.
- Pin the pattern pieces to the fabric.
- Cut slowly around the edges for accuracy.
- Remember to cut two pieces for the lining, just like the outer bag.
Cutting carefully helps avoid puckering or bunching later.
Attaching The Lining
Place the lining pieces right sides together. Sew along the edges like the outer fabric. Leave a small opening to turn the bag inside out later.
- Align the lining pieces with the outer bag pieces.
- Pin the lining to the outer fabric, right sides facing each other.
- Sew around the edges with a ¼ inch seam allowance.
- Leave an opening of about 3-4 inches for turning the bag.
Turn the bag through the opening carefully. Push out corners for a crisp shape. Finally, hand stitch the opening closed with small, neat stitches.
Installing The Zipper
Installing the zipper is a crucial part of making your cosmetic bag functional and stylish. A well-installed zipper ensures smooth opening and closing, keeping your items secure. Let’s look at how to choose the right zipper and sew it neatly into your bag.
Choosing The Right Zipper
The type of zipper you pick can make or break your cosmetic bag’s usability. Consider the length carefully; it should match the width of your bag’s opening for a clean finish.
Metal zippers add durability but might be stiff for beginners. Plastic or nylon coil zippers are flexible and easier to sew, perfect if you’re new to zipper installation.
Think about color too. Matching the zipper color to your fabric creates a seamless look, while a contrasting zipper can add a pop of interest. What vibe do you want your bag to give off?
Sewing The Zipper In Place
Start by pinning the zipper face down along the edge of the fabric where you want it to sit. Make sure the zipper teeth align with the fabric edge evenly.
Use a zipper foot on your sewing machine for close stitching. This tool helps you sew right next to the zipper teeth without breaking your needle.
Sew slowly to maintain control, especially around the zipper ends. Backstitch at the start and end to secure the stitches, preventing the zipper from coming loose.
If you find the zipper puckering the fabric, try adjusting your stitch length or press the seam gently with an iron. Have you noticed how small adjustments can make a big difference in sewing quality?
Finishing Touches
Finishing touches transform your cosmetic bag from simple to stunning. They add strength and personality, ensuring your creation lasts and looks great. These final steps make sewing a cosmetic bag truly satisfying.
Topstitching For Durability
Topstitching is a small step that makes a big difference. It strengthens the seams and helps the bag keep its shape. Use a slightly longer stitch length and sew close to the edge for a clean, professional look.
Choose a thread color that either matches your fabric for subtlety or contrasts for a bold statement. If you’ve ever noticed how store-bought bags hold up after months of use, chances are they have topstitching reinforcing the edges.
Try topstitching around the zipper and the bag’s opening. It prevents the fabric from stretching or fraying and gives you a neat finish. Have you tried sewing without topstitching and noticed how the edges can curl or look unfinished?
Adding Decorative Elements
Personalizing your cosmetic bag makes it uniquely yours. Adding decorative touches like appliques, embroidery, or fabric paint brings your style into the project. Even simple additions like a ribbon pull on the zipper can enhance both form and function.
- Use iron-on patches to add fun designs without much effort.
- Hand embroidery lets you write names or create small patterns.
- Try fabric markers to draw geometric shapes or doodles.
Think about the bag’s user—will it be a gift or for yourself? Adding a small inside pocket or a key holder loop can improve usability while still looking stylish. What small detail could make your bag stand out every time you reach for it?
Tips For Customization
Customizing your cosmetic bag makes it truly yours. You can match your style and needs easily. Small changes can create big effects. Explore different fabrics, add personal touches, or change the size and shape. Each choice adds a unique flair to your bag.
Using Different Fabrics
Choose fabrics that fit your style and use. Cotton is soft and easy to sew. Canvas is strong and holds shape well. Waterproof fabrics protect your items from spills. Mix fabrics for a fun, textured look. Remember to pick fabric that matches your sewing skills.
Personalizing With Monograms
Add your initials for a special touch. Use embroidery thread or fabric paint. Iron-on letters also work well. Place the monogram where it stands out, like the front or zipper area. Monograms make your bag easy to find and unique.
Adjusting Size And Shape
Change the size to fit your needs. Make a small pouch for lipsticks or a large one for brushes. Alter the shape to add style—try a square, round, or trapezoid design. Adjust patterns by measuring your items first. This way, your bag holds everything perfectly.

Credit: www.youtube.com

Credit: www.youtube.com
Frequently Asked Questions
What Materials Are Needed To Sew A Cosmetic Bag?
To sew a cosmetic bag, you need fabric, lining, zipper, scissors, pins, thread, and a sewing machine. Choose durable and water-resistant fabric for better use. Proper materials ensure a sturdy and attractive cosmetic bag.
How Do I Choose The Right Fabric For A Cosmetic Bag?
Pick fabric that is durable, water-resistant, and easy to clean. Cotton, canvas, or vinyl are popular choices. The fabric should also suit your style and sewing skill level for the best results.
Can Beginners Sew A Cosmetic Bag Easily?
Yes, beginners can sew a cosmetic bag with basic sewing skills. Simple patterns and clear instructions help. Starting with small projects like this builds confidence and improves sewing techniques effectively.
How Long Does It Take To Sew A Cosmetic Bag?
Sewing a cosmetic bag typically takes 1 to 2 hours. Time varies depending on skill level and bag complexity. Simple designs are quicker, while adding pockets or lining takes more time.
Conclusion
Creating your own cosmetic bag is simple and rewarding. You gain a unique item and sewing skills. Practice makes perfect, so try different fabrics and styles. Enjoy the process of crafting something personal and functional. Share your creations with friends or family.
They might love a handmade gift. Remember, sewing is a journey. Each project improves your technique. Keep experimenting and learning. Soon, you’ll sew with confidence and creativity. Happy sewing!