Are you tired of seeing your textbooks get worn out and tattered by the end of the school year? Protecting them doesn't have to be a hassle or an expensive endeavor.
In fact, you might have the perfect solution sitting right in your kitchen: a simple paper bag. Not only is this method cost-effective and eco-friendly, but it also allows you to add a personal touch to your books. Imagine opening your locker to find a neat, custom-covered textbook that stands out from the rest.
Intrigued? Read on to discover how this quick and easy technique can keep your textbooks looking fresh and unique all year long.
Choosing The Right Paper Bag
Choosing the right paper bag is key to giving your textbook a neat and protective cover. The bag you pick affects how well the cover fits and how long it lasts. Think about the type, size, and strength of the bag before you start covering.
Types Of Paper Bags
Not all paper bags are the same. Some are thin and smooth, while others are thick and rough.
- Kraft Paper Bags:These are sturdy and have a natural look. They handle wear well, making them a solid choice for heavy textbooks.
- Grocery Paper Bags:Common and easy to find, but they can tear easily if thin. Check their thickness before using.
- Recycled Paper Bags:Eco-friendly and often stronger than expected. They can add a unique texture to your cover.
Think about what feels right in your hands and how much protection your book needs.
Size And Durability Considerations
Size is critical. The bag should be big enough to wrap around your book with some extra space to fold inside.
Measure your textbook’s height, width, and spine thickness, then compare it to the bag’s dimensions.
| Book Size (inches) | Recommended Bag Size (inches) |
|---|---|
| 9 x 6 x 1.5 | 12 x 9 |
| 11 x 8.5 x 2 | 14 x 11 |
| 12 x 9 x 3 | 16 x 13 |
Durability matters too. If you carry your book around all day, a thicker bag will protect against rips and spills better.
Have you ever had a cover tear the first week? Choosing a bag with extra strength can save you from that hassle.
Gathering Your Materials
Before you start covering your textbook with a paper bag, it’s important to gather all the materials you’ll need. Having everything on hand makes the process smoother and less frustrating. You’ll want to separate the essentials from the optional extras to focus on what truly matters first.
Essential Tools
- Paper bag:Choose one large enough to fully wrap your textbook. Brown paper bags work well because they are sturdy and easy to write on.
- Scissors:Sharp scissors help you cut the paper neatly without tearing.
- Glue stick or tape:These will secure the paper bag around the book. A glue stick offers a cleaner look, but tape is quicker.
- Ruler:Use it to measure and fold the paper precisely, ensuring a tight fit.
- Pencil:Mark where you need to cut or fold without leaving permanent marks.
Having these tools ready prevents interruptions. I once started without scissors and ended up tearing the paper trying to rip it by hand. It’s a small detail that can save time and frustration.
Optional Decorative Supplies
- Colored markers or pens:Add your name or doodle designs directly on the cover.
- Stickers:Personalize your book with fun or motivational stickers.
- Washi tape:Use it to add colorful borders or reinforce edges.
- Stencils:If you’re not confident in freehand drawing, stencils can help create neat patterns or letters.
- Clear contact paper:Protect your decorated cover from wear and tear by laminating it.
Do you want a simple, clean look or something that stands out? The choice of decorations lets you express your personality and makes your textbook easier to spot in a crowded backpack.
Preparing The Paper Bag
Preparing the paper bag is the first key step to cover a textbook neatly. A paper bag provides a sturdy and reusable cover that protects your book. Before wrapping, the bag needs some adjustments. Flattening it and removing any handles or seams will make the cover smooth and easy to work with.
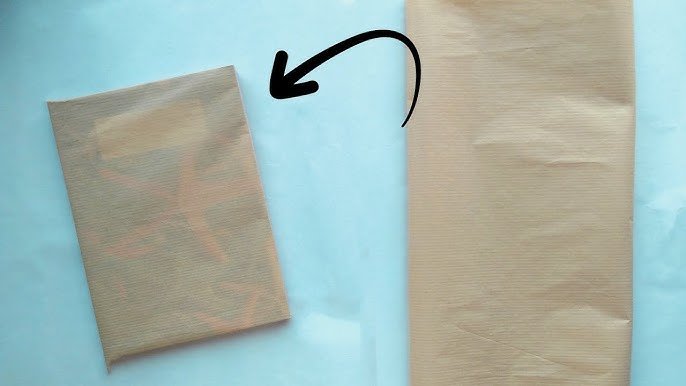
Cutting And Flattening
Start by cutting the paper bag open along one side seam. Use sharp scissors for clean edges. After cutting, unfold the bag carefully. Lay it flat on a table. Press down gently to remove any folds or wrinkles. A flat surface will help you measure and wrap the textbook accurately. This process also makes the paper bag easier to fold and glue later.
Removing Handles And Seams
Most paper bags have handles and glued seams that can cause bumps. Cut off the handles close to the bag's top edge. Use scissors to remove the glued side seams by slicing along the edges. Removing these parts prevents lumps and keeps the cover smooth. A seamless paper surface fits better around the book and looks neat.

Credit: www.youtube.com
Wrapping The Textbook
Wrapping your textbook with a paper bag is more than just a simple task—it’s about creating a snug, protective cover that lasts. The key lies in how you fit the bag and handle the edges. Getting these right ensures your book stays neat and secure throughout the school year.
Fitting The Bag Over The Book
Start by selecting a paper bag that’s slightly larger than your textbook. This gives you room to work without tearing the bag or leaving it too tight.
Open the bag fully and slide your textbook inside. Make sure the spine of the book aligns with the bag’s crease for a smooth fit. If the bag feels loose, don’t worry—you can adjust it during the next steps.
Have you noticed how a bag that’s too small can cause wrinkles and folds? Choosing the right size prevents that and keeps your cover looking clean and professional.
Folding And Securing Edges
Once the bag is on, fold the excess paper at the top and bottom edges carefully. Use sharp creases to hold the folds tight against the book.
Secure these folds with clear tape or glue, focusing on corners where the bag tends to lift first. This not only protects the book but also prevents the cover from shifting as you carry it around.
Try to keep your folds straight and even—crooked edges can catch on things and wear out faster. Have you experimented with different folding techniques to find what works best for your book’s shape?
Securing The Cover
Securing the cover is an important step in protecting your textbook. It keeps the paper bag from slipping off. A well-secured cover lasts longer and looks neat. Simple tools like tape or glue help hold everything in place. Making sure the cover fits tightly prevents damage and keeps the book safe.
Using Tape Or Glue
Use clear tape for a clean look. Place tape along the edges of the paper bag. This holds the cover firmly on the textbook. Avoid too much tape to keep the cover flexible. Glue works well for a stronger hold. Apply a thin layer of glue on the inside edges. Press the paper bag firmly against the book. Let it dry completely before use.
Ensuring A Tight Fit
Check the bag fits snugly around the book. Fold any extra paper inside to avoid loose ends. Smooth out wrinkles or bubbles for a neat finish. A tight cover stops the bag from sliding. It also protects book corners from bending. Adjust folds to match the book's shape. This simple step keeps the cover secure all day.
Creative Decorating Ideas
Adding a personal touch to your textbook cover transforms a simple paper bag into a unique expression of your style. Creative decorating not only makes your book stand out but also motivates you to open and use it more often. Let’s explore some fun and easy ways to bring your cover to life.
Drawing And Painting
Grab some colored pencils, markers, or watercolors to turn your cover into a mini canvas. You can sketch your favorite quotes, doodle patterns, or paint abstract designs that reflect your mood.
Try using bold colors to make your drawings pop or subtle shades for a more calming effect. Have you ever thought about combining geometric shapes with hand-lettering? It’s a simple way to add depth and interest.
Adding Stickers And Labels
Stickers are a quick and easy way to personalize your book cover. Collect stickers that represent your hobbies, favorite shows, or motivational words and arrange them in a collage.
Labels can help organize your cover too. Write down your name, subject, or important dates on colorful labels and place them neatly. What’s your favorite sticker theme to show off on your textbooks?
Using Stamps And Stencils
Stamps and stencils let you create repeating patterns or precise shapes without much effort. Choose stamps with fun icons or create your own designs to stamp around the edges of your cover.
Stencils are perfect for adding words or images with clean lines. Layer different colors for a vibrant effect or keep it monochrome for a sleek look. Have you tried mixing stamps and stencils to see what interesting patterns you can create?
Maintenance Tips
Maintaining a paper bag cover extends its life and keeps your textbook looking neat. Simple care helps prevent dirt and damage. Regular attention protects the cover from daily wear.
Keeping The Cover Clean
Wipe the cover gently with a dry cloth to remove dust. Avoid using water, which can weaken the paper. For stubborn spots, use a soft eraser carefully. Store the textbook in a dry place to prevent moisture stains. Avoid placing the book on dirty or wet surfaces.
Repairing Tears And Wear
Small tears can be fixed with clear tape on the inside of the cover. Use tape sparingly to keep the paper flexible. For worn edges, fold them inward and secure with glue or tape. Replace the cover if damage becomes too large. Regular checks help catch damage early.

Credit: www.youtube.com

Credit: www.shihomasuda.com
Frequently Asked Questions
How Do You Prepare A Paper Bag For Textbook Covering?
Start by selecting a sturdy paper bag. Cut it open along one side and the bottom. Flatten it out to create a single sheet. This will serve as the cover for your textbook, ensuring full protection and easy wrapping.
What Size Paper Bag Fits Most Textbooks Best?
Choose a paper bag slightly larger than your textbook. This allows enough room to fold and secure the edges. A medium or large grocery paper bag usually works well for standard textbooks.
How Do You Secure The Paper Bag Around The Book?
Use clear tape or glue to attach the paper bag edges. Fold the excess paper neatly over the book’s corners. Secure the folds to prevent slipping and ensure a tight, protective cover.
Can You Decorate A Paper Bag Textbook Cover?
Yes, paper bag covers are perfect for decorating. Use markers, stickers, or stamps to personalize your textbook. This makes your book unique and easy to identify while protecting it.
Conclusion
Covering a textbook with a paper bag is simple and useful. It protects your book from dirt and damage. You only need a few steps and basic materials. This method saves money and helps keep your books neat. Try it yourself and see how easy it is.
Your textbooks will last longer and look better. A small effort makes a big difference. Give it a go!